Quick Reference Guide
ADD NEW DATASET: USING CONNECTORS
- Quick Reference Guide
- ADD NEW DATASET: USING CONNECTORS
Mapline connectors make it easier than ever to integrate your data directly from external platforms into your Mapline account. Whether you’re pulling data from your CRM, ERP, or any other supported system, our connectors streamline the process to keep your maps and reports updated effortlessly. In this guide, we’ll walk you through the step-by-step process of adding a new dataset using a Mapline connector, so you can focus on gaining insights instead of managing imports.
ADD FROM CONNECTOR
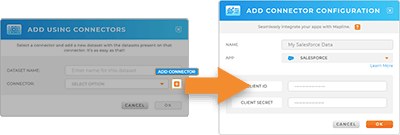
If your data is saved in another platform or application, no sweat! Simply click the orange ADD button in the top-left corner of the Mapline homepage’ hover over DATASET and select USING CONNECTORS.
From there, name your connection, select the application you want to connect to, enter your credentials (such as Salesforce client ID or Google Drive login), then click OK.


Pro Tip: Learn how to seamlessly pull data from your favorite platforms like Salesforce, Google Sheets, and others directly into Mapline. Check out our step-by-step Mapline Connectors guide!
SELECT DATA
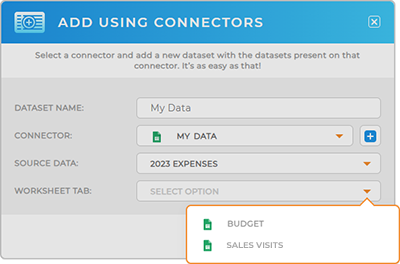
From here, you’ll have the option to customize the data you’re importing, such as selecting specific source data to better align with your goals. This step ensures that your data is clean, relevant, and ready to be used effectively, saving you time and improving the accuracy of your insights.
Once you’ve finished tailoring the data to your needs, simply follow the instructions in the lightbox, then click OK. With this level of customization, you’ll maximize the value of your imported data, making it easier to visualize, analyze, and act on.

USE YOUR DATASET
Once your data is uploaded to Mapline, the possibilities are endless! Whether you’re building maps or uncovering valuable insights, your dataset transforms into a dynamic decision-making asset. Here are some innovative ways businesses put their data to work:
- Incorporate custom territories into your mapping projects
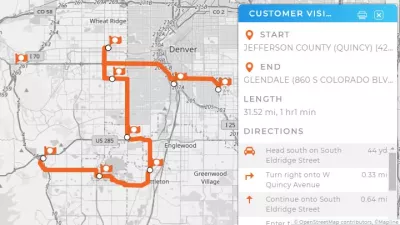
- Design optimized routes for single-use navigation
- Analyze and benchmark competitor footprints in key markets
- Produce geo-driven reports, dashboards, and charts


